

ine 5341OpenGL
 |
Este tutorial é baseado principalmente em uma tradução do OpenGL Tutorial de Jeff Molofee & Neon Helium e está constantemente sendo extendido com novos exemplos e material teórico que fundamenta as técnicas descritas. Na medida do possível todas as técnicas e exemplos descritos aqui foram testados e avaliados. Comentários sobre o tutorial são bem-vindos. |
É comum querermos utilizar texturas provenientes de alguma imagem para usar para prover realismo a um objeto, como por exemplo uma fotografia de um pedaço de muro de alvenaria para ser usado para dar realismo à muralha do castelo que estamos construindo em nosso mundo virtual. Para realizar isto, utilizamos uma técnica denominada mapeamento de texturas. OpenGL tem várias formas diferentes de trabalhar com texturas. Aqui veremos as principais delas. Masi tarde quando formos ver superfícies curvas e superfícies com comportamento de flâmula veremos mais texturas.
Conteúdo
![]() 5.1.
Conceitos Básicos usando Texturas
5.1.
Conceitos Básicos usando Texturas
![]() 5.2.
Filtros de Textura, Iluminação e Controle por Teclado
5.2.
Filtros de Textura, Iluminação e Controle por Teclado
![]() 5.3.
Sobreposição de Imagens e Transparência
5.3.
Sobreposição de Imagens e Transparência
![]() 5.5.
Bump-Mapping, Multi-Texturização e outras técnicas
avançadas
5.5.
Bump-Mapping, Multi-Texturização e outras técnicas
avançadas
![]() 5.6.
Função de Blitter, carga de Texturas em Formato RAW
5.6.
Função de Blitter, carga de Texturas em Formato RAW
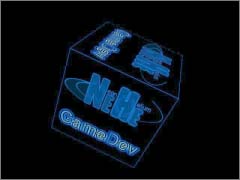 |
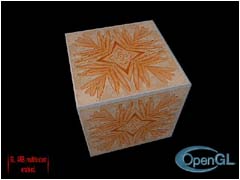
5.1.
Conceitos Básicos usando Texturas
You asked for it, so here it is... Texture Mapping!!! In this tutorial I'll teach you how map a bitmap image onto the six side of a cube. We'll use the GL code from lesson one to create this project. It's easier to start with an empty GL window than to modify the last tutorial. You'll find the code from lesson one is extremely valuable when it comes to developing a project quickly. The code in lesson one sets everything up for you, all you have to do is concentrate on programming the effect(s). |
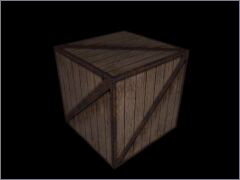 |
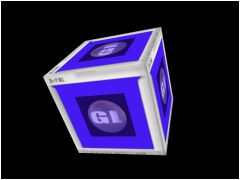
5.2. Filtros de Textura, Iluminação e Controle por Teclado Ok, I hope you've been understanding everything up till now, because this is a huge tutorial. I'm going to attempt to teach you 2 new ways to filter your textures, simple lighting, keyboard control, and probably more :) If you don't feel confident with what you've learned up to this lesson, go back and review. Play around with the code in the other tutorials. Don't rush. It's better to take your time and learn each lesson well, than to jump in, and only know enough to get things done. |
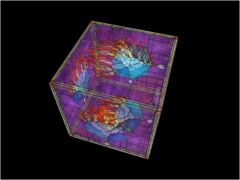 |
5.3. Sobreposição de Imagens e Transparência There was a reason for the wait. A fellow programmer from the totally cool site Hypercosm, had asked if he could write a tutorial on blending. Lesson eight was going to be a blending tutorial anyways. So the timing was perfect! This tutorial expands on lesson seven. Blending is a very cool effect... I hope you all enjoy the tutorial. The author of this tutorial is Tom Stanis. He's put alot of effort into the tutorial, so let him know what you think. Blending is not an easy topic to cover. |
 |
5.4. Máscaras Up until now we've been blending our images onto the screen. Although this is effective, and it adds our image to the scene, a transparent object is not always pretty. Lets say you're making a game and you want solid text, or an odd shaped console to pop up. With the blending we have been using up until now, the scene will shine through our objects. By combining some fancy blending with an image mask, your text can be solid. You can also place solid oddly shaped images onto the screen. A tree with solid branches and non transparent leaves or a window, with transparent glass and a solid frame. Lots of possiblities! |
 |
5.5. Bump-Mapping, Multi-Texturização e outras técnicas avançadas This tutorial code was written by Jens Schneider. Right off the start I'd like to point out that this is an advanced tutorial. If you're still uncertain about the basics, please go back and read the previous tutorials. If you're a new GL programmer, this lesson may be a bit much. In this lesson, you will modify the code from lesson 6 to support hardware multi-texturing on cards that support it, along with a really cool visual effect called bump-mapping. Please let Jens Schneider know what you think of the tutorial, it's always nice when visitors contribute to the site, it benefits us all. Everyone that has contributed a tutorial or project deserves credit, please let them know their work is appreciated! |
 |
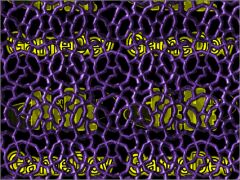
5.6.
Função de Blitter, carga de Texturas em Formato RAW
This tutorial was written by Andreas Löffler. In this tutorial you will learn how to load .RAW image files. You will also learn how to write your own blitter routine to modify textures after they have been loaded. You can copy sections of the first texture into a second texture, you can blend textures together, and you can stretch textures. The same routine can be modified to create realtime plasma and other cool effects! If you enjoy the tutorial let Andreas know! |

